
Disclosure: This post contains affiliate links and we may receive a referral fee (at no extra cost to you) if you sign up or purchase products or services mentioned. As an Amazon Associate, I earn from qualifying purchases.
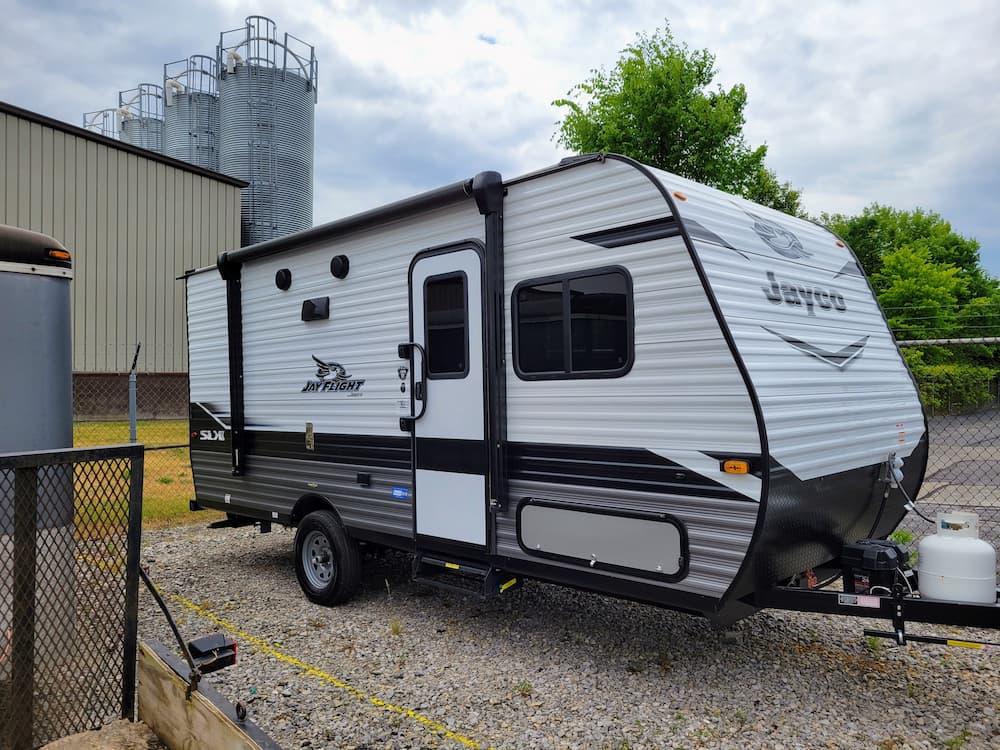
This past spring, Lisa and I bought an RV travel trailer – a 2022 Jayco Jay Flight SLX 7 184BS to be more exact.
We’ve never owned an RV and we didn’t know much about them. All we knew was that our family of three had two incredible month-long road trips in our Honda Pilot in 2020 and in 2022.
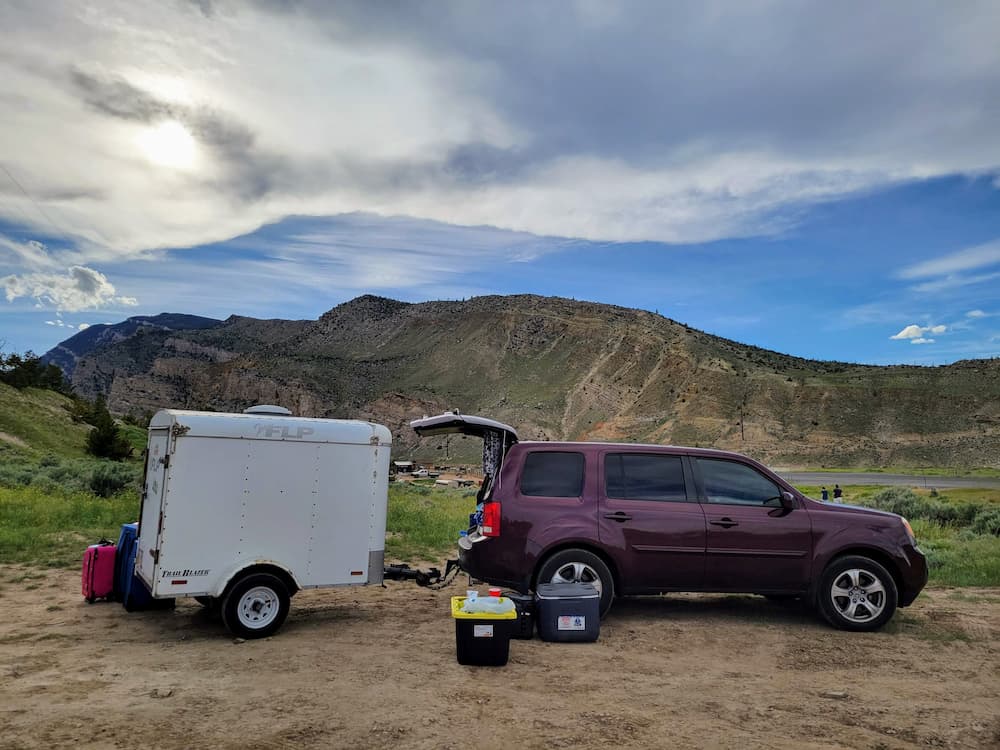
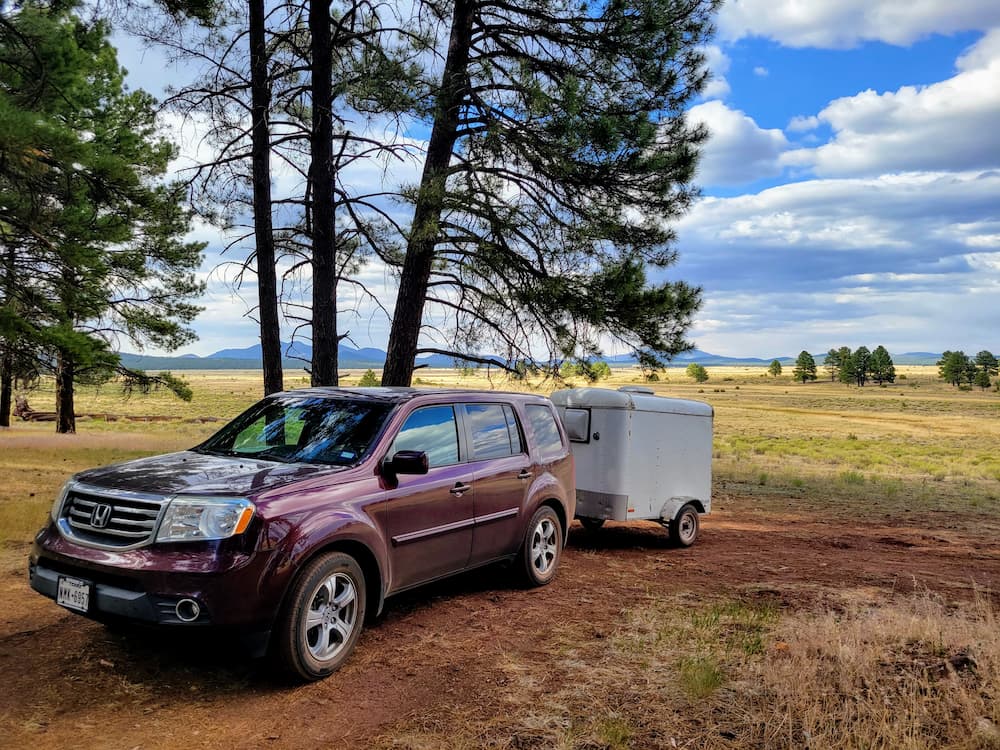
So why not try something bigger just because we can? That led us to planning a 9-month road trip, buying the Jayco RV, and a 2012 Ford Expedition to pull it.
We quickly learned that there’s a ton we didn’t know about this world! But we’ve caught up fast and we’re going to be living in our RV starting in October before we head out to travel the country starting in November.
But we’re doing something a little outside of the norm (no surprises there!). Rather than spending most of our time hopping from RV park to RV park, we’re planning to utilize the majority of our time boondocking. That should make our trip even more amazing and, almost just as important, save us a ton of money over staying at RV parks full-time.
What is boondocking anyway? Well, I’m going to fill you in on that as well as why we think boondocking will be better than staying at RV parks as well as the changes we’ve been making to prepare to do this right.
What is boondocking?
You’re probably familiar with RV parks where folks bring their RVs and usually cram them in alongside several, if not hundreds, of other RVs. In a lot of places, an RV park will have hookups for sewer, water, and electricity. Some of the facilities are even resort-like with swimming pools, gaming rooms, laundry facilities, and more.
On the other side of the spectrum, you have boondocking (such a fun word!).
Boondocking simply means that you’re camping somewhere off-grid where you generally need to rely on your own resources. This can be in national forests, Bureau of Land Management (BLM) land, deserts, or other remote places where camping is allowed.
If you’re not familiar, BLM lands are owned by the American people, meaning they’re public lands. The lands are held in trust by the federal government for the benefit of present and future generations. BLM land accounts for about a whopping 10% of the U.S. land area – that’s a huge number!
But, whereas you might have hookups for your sewer, water, and electricity at an RV, you won’t have any of that while boondocking. You’re generally just setting up on raw land and need to be self-sustaining while you’re there.
Why boondocking can be better than RV parks
While some might find the idea of going off-grid a little disconcerting, the rewards can be pretty great. Here are the three things I find most tantalizing about boondocking:
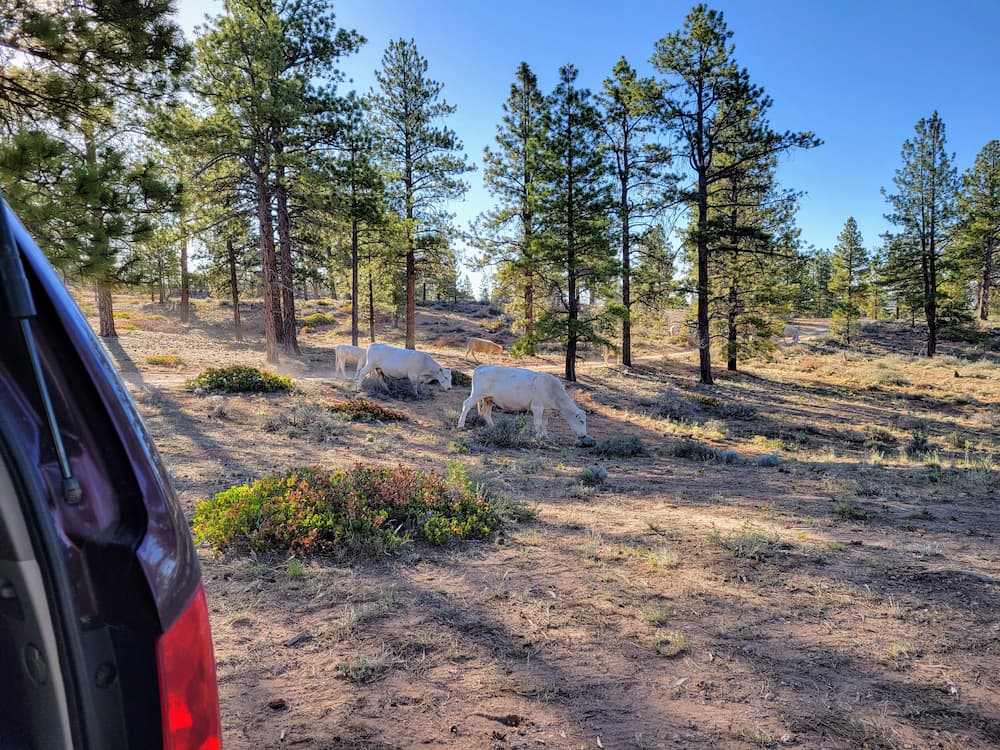
- You can stay in some mind-blowing places.
- You’re not packed in like sardines. In many cases, there might only be a couple of other travelers nearby or possibly none at all.
- Boondocking can be 100% completely free!!
Not everyone’s going to find this appealing as each of us has our own level of comfort. However, we tried boondocking several times during our road trip last year and we were blown away by the spectacular places we stayed throughout the country!
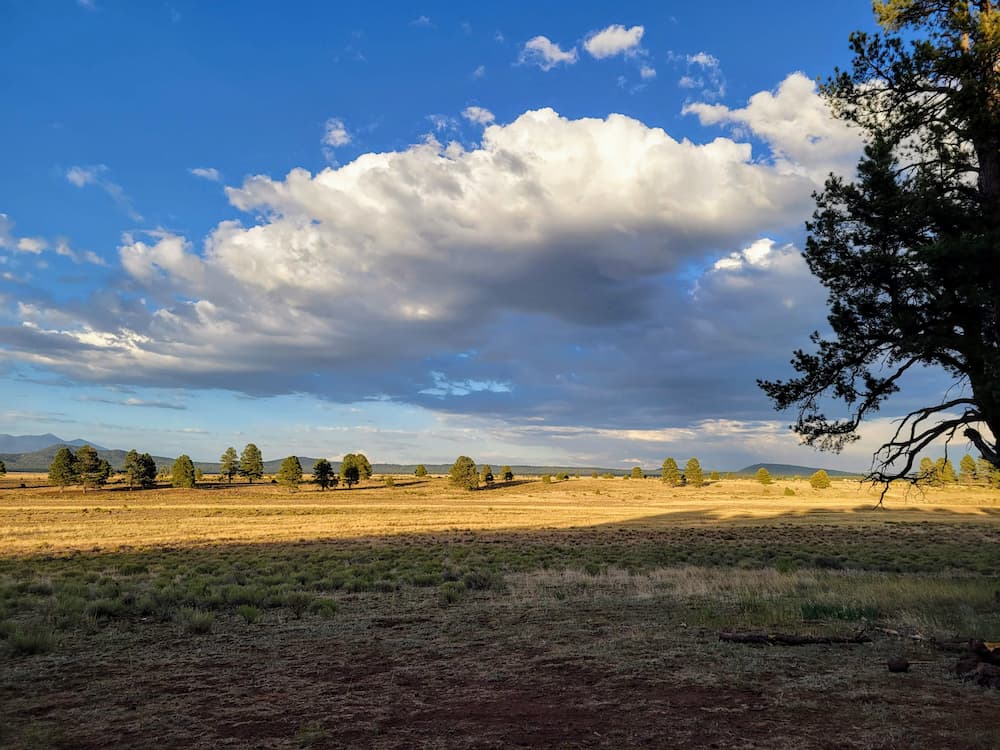
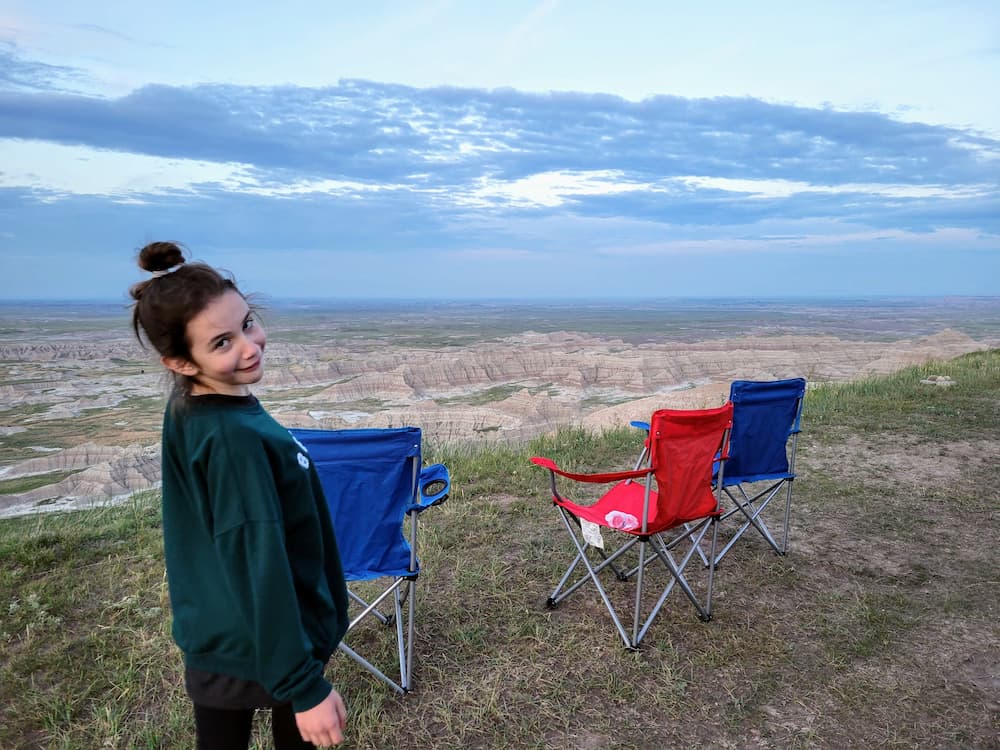
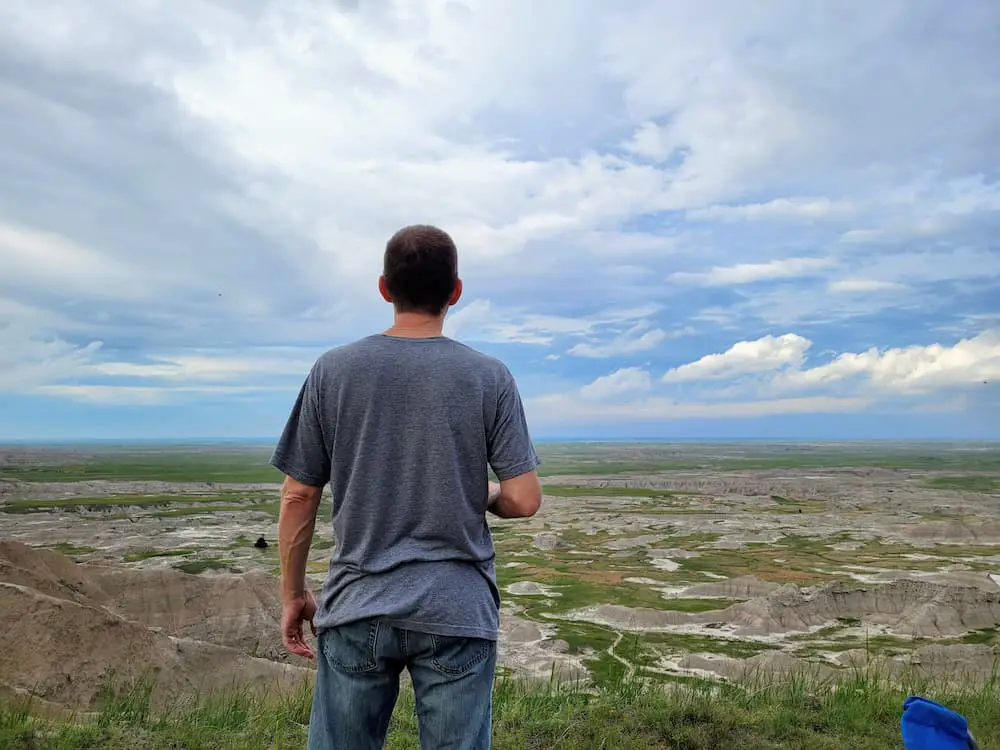
Pictures can’t do these places justice by any stretch of the imagination. There were plenty of moments of just thinking, “Holy @#$%, this is where we’re actually staying tonight!”
And the fact that you’re not jammed in just a few feet away from the next camper is nice, too. I’m good with having a couple of neighbors and chatting it up periodically but some of these RV parks are just way too cramped. A little privacy would be nice!
On top of that, the cost of RV parks just continues to climb. During and after COVID, RV sales went up and up. And as the parks became more crowded, supply and demand won out. It’s not unusual to see RV parks charging $100/night or more. I can get a hotel for less than that!
Can you guess how much a night of boondocking on BLM costs? $0. Well, hoody-hoo, that’s my favorite cost!!
Not all boondocking is free but most of the time it will be on BLM land. Other areas are also going to be very low-cost or free as well. So not only will we get to stay in some amazing places throughout the country, but we’ll save a fortune by doing so!
We found that apps such as these helped us find some incredible boondocking spots to stay on our road trip last year:
- Campendium
- iOverlander
- FreeRoam
- The Dyrt
- Freecampsites.net (website only)
We’ll still be utilizing RV parks so we can regroup and drain our tanks and refill on water (and take longer showers!) but we’re hoping that our RV park time averages out to around one night a week.
To boondock longer, changes can pay off big time
The longer you want to stay out boondocking, the more prepared you need to be. If you’ve got a big rig with monster tanks for water, sewage, and gray water, you’ve got a pretty good start. If you’ve got a big battery bank, lots of propane, and a built-in generator (with a lot of fuel on hand), you’ve scored some more points.
We don’t have that. Our trailer isn’t very big – it’s under 22′ with three 20-gallon tanks for holding water, sewage, and gray water. It also had one 100-amp lead acid battery on board and a 20-gallon propane tank.
But any changes you can make to keep yourself from having to leave when you’re not ready to might be worth considering. Remember, one bottleneck can make the other changes not worth it.
You could have bought everything in the world to stay out boondocking for weeks, but if your black tank gets full, for example, it’s time to go. So finding the right balance depends on what you have room for and how much of an investment you want to make on both your rig and your supplies.
We don’t need to stay in a place for weeks (side note, you’re usually limited to a max of 14 days in BLM lands), but there will be places where we’d like to stay for several days without worrying. So the changes we made seem like the right balance for our needs. You might need less or you might need more depending on what you’re hoping to do.
For what I’d consider a smaller investment, we’ll be able to save thousands of dollars by not needing to stay in RV parks as often.
From lead acid to lithium
This one was sort of a gimme and I rolled the dice a little bit.
Lead acid batteries are cheap and do the job pretty decently. But a LiFePO4 lithium battery has a lot more going for it:
- It’s about a third to half the weight of a lead acid battery
- It can be drained to 0% whereas a lead acid shouldn’t be taken down to less than 50% of its capacity
- It charges faster
- It’s got a longer lifespan
- It’s more tolerant of high temperatures
- It’s safer, less likely to leak, and it doesn’t require maintenance
In other words, it’s the way to go except for one thing… it’s got a bigger price tag. And sometimes it’s got a much bigger price tag.
You’ll see everyone and their brother on the internet pushing Battle Born batteries. Is it because they’re the best out there? Maybe, maybe not. But I’m sure that it doesn’t hurt that they’ve got a solid affiliate program (aka commission).
I went a different route. Instead of paying close to $1,000 for a 100Ah 12V LiFePO4 Deep Cycle battery from Battle Born (not an affiliate link), I bought a CHINS 12V 100AH LiFePO4 Lithium Iron Battery from Walmart for just $260 (it’s also on Amazon).
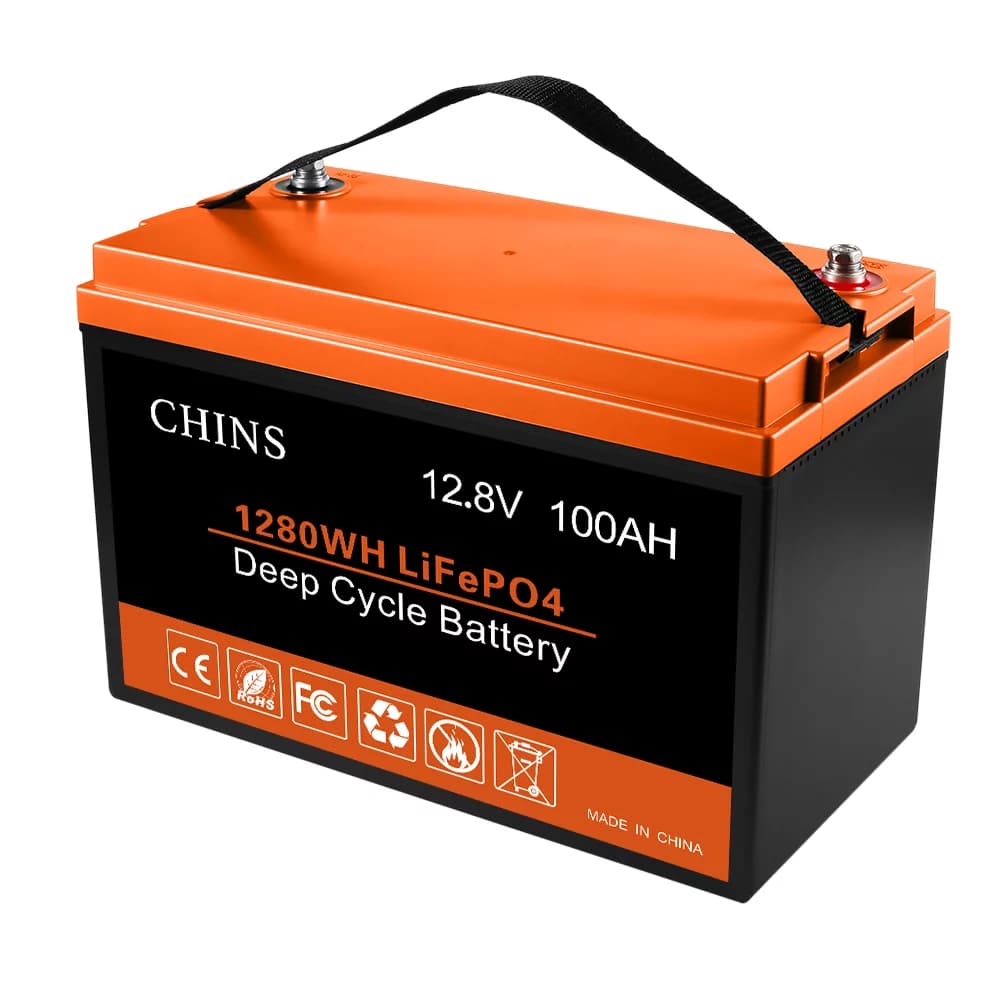
Will a $260 Chinese-made battery be as good as a $1,000 Battle Born battery? I guess time will tell. But from the few basic tests I did on it with my multimeter and what I’ve seen so far with it, I feel that it was a good purchase.
More importantly, this 100 Ah battery essentially doubled my battery capacity over the 100 Ah lead acid battery that was in there. Why would that be? Because you should never use more than half the capacity of a lead acid battery whereas you can discharge a LiFePO4 battery essentially to zero.
The converter in my RV didn’t support lithium batteries though so I also needed to change that out. Although it would still work, it won’t charge it up to full capacity or as quickly.
I replaced my WFCO WF-8735-P converter with a WFCO WF-8735-AD converter. That swap looked easy enough to do from the YouTube videos so I gave it a whirl. The folks who are handier than me said it took them about 90 minutes… it took me about 6-7 hours including one trip to Menard’s! Ugh, but I got it done and working.
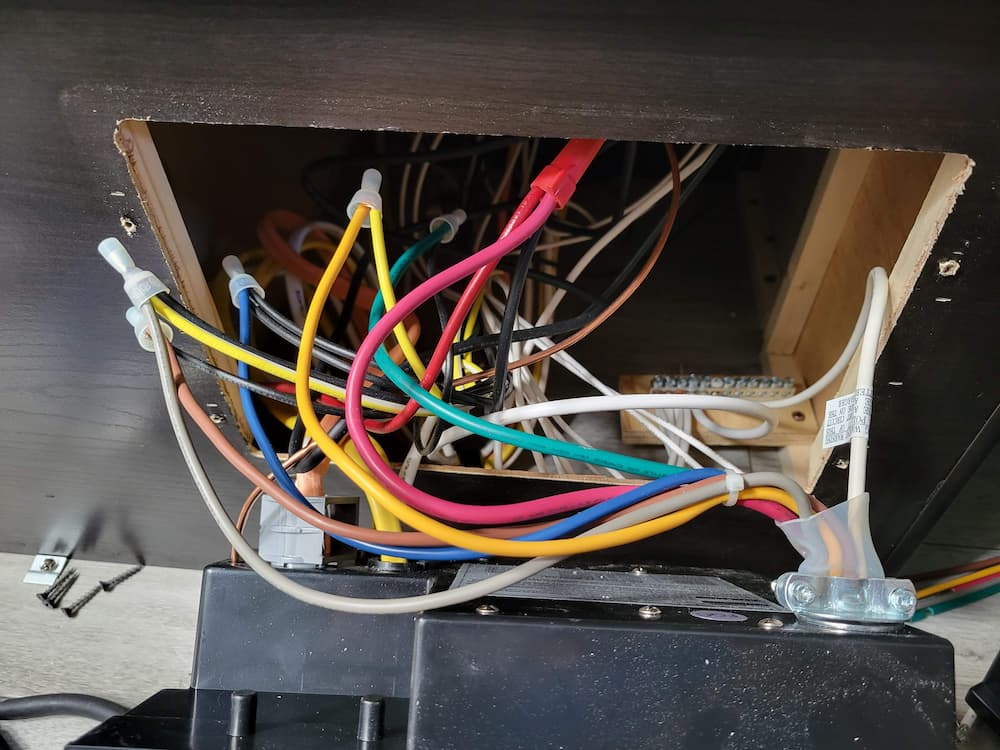
The new converter was about $170 and I sold the old one for $50.
Between the battery and the converter, that made my entire lithium upgrade cost less than $400, plus, of course, my time. I think this was a good deal.
Some generator fun!
We initially bought a Westinghouse iGen4500c 4500-watt/3700-watt inverter generator on sale for about $700. I didn’t like it from the start because it was just so darn heavy and the thought of lugging it in and out routinely was not something I was looking forward to. The good news I guess is that it wasn’t working correctly so I returned it.
After a lot of research, I decided to buy two Firman W01682 2000-watt/1600-watt inverter generators instead. I liked this idea because we could mostly get away with one, which is only about 46 pounds (much easier to handle). But when we need two (in order to run our air conditioning in the RV), I could connect a second one to the first with the included parallel cables and get twice the power.
It also has a 30-amp outlet on it and comes with an “RV” adapter so you can plug the generator directly into the RV. This is unusual for these small generators and a real perk to have.
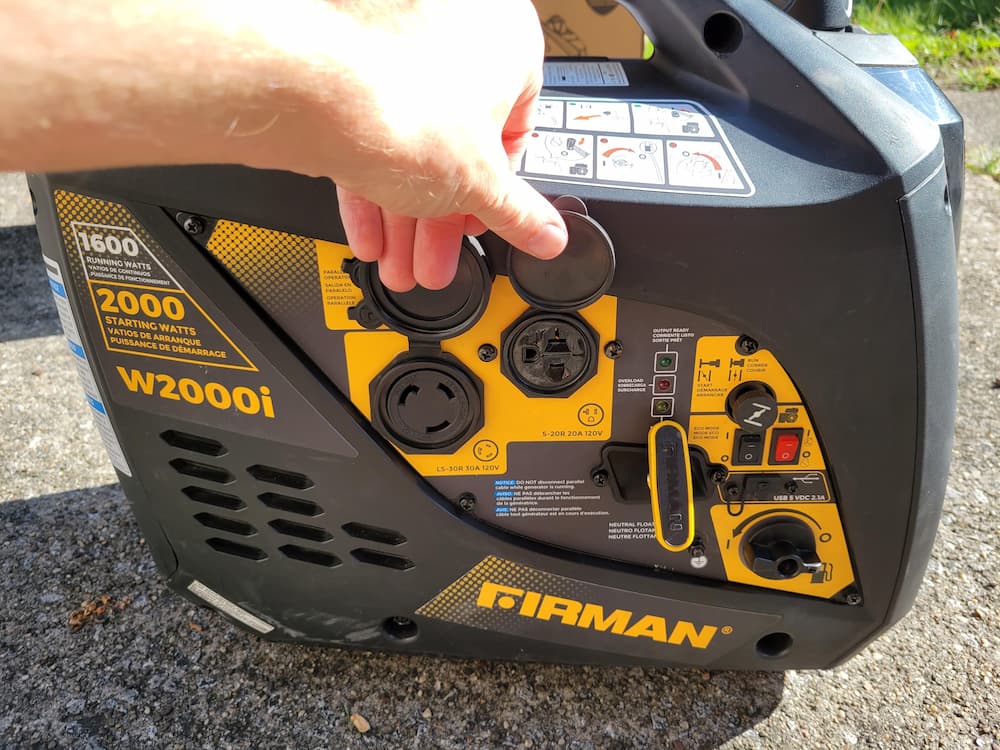
They have these generators at Costco for around $490/each, but I was reading how they periodically go on sale so I decided to wait. In the meantime though, I found out that Firman has an eBay store where they sell reconditioned models of that generator that were priced at $250.
That’s two for about the price of one from Costco. And they’re refurbished by Firman to be almost as good as new…
“This product has been REFURBISHED to exacting specifications by FIRMAN technicians. Certified to work as new. May have cosmetic blemishes.”
— Firman eBay store for the W01682F generator
The Cadillac of these portable inverters is the Honda EU2200i, which runs about $1,200. Two of these suckers would be $2,400 so paying $250 each for the Firman ones sounds like a pretty good deal. The refurbished Firman generators also come with free returns and a 2-year warranty so it was worth a shot.
It’s a tremendously long and drawn-out story, but in a nutshell, I ended up with one reconditioned one from Firman’s eBay page when it went on sale for $200 and a brand new one from Costco when it went on sale for $340. Additionally, Firman had sent me one that didn’t work (likely a gummed-up carburetor jet) that they refunded me and let me keep, so I’m going to fix that and resell it.
Two generators for $540 and some extra money coming in once I resell the broken one and we’re all set on the generator side of things!
Adding a little solar to help keep the battery topped off
Sometimes we’re not going to want to have the generator(s) running. Although they’re crazy quiet, they still make some noise, which can take away from immersing yourself and enjoying nature. Additionally, it costs money for ongoing fuel and some places have restrictions on running generators during certain hours or even at all.
That’s where solar power comes in.
You could go crazy and try to outfit your rig to provide enough solar power to handle your AC and all the rest of your power to live off-grid. If you could even do it, you’d be spending a ridiculous amount of money.
I don’t need that. But I do want to have a little bit of juice coming in so I can top off the batteries when the sun’s out and I don’t want to worry about the generators.
I decided to get the Renogy 200-Watt 12-Volt Portable Solar Panel Suitcase for about $300. It’s got a built-in solar controller as well. I also picked up the Renogy 20′ 12AWG extension cables for about $23 to give myself a little more breathing room as to where I set up the panels.
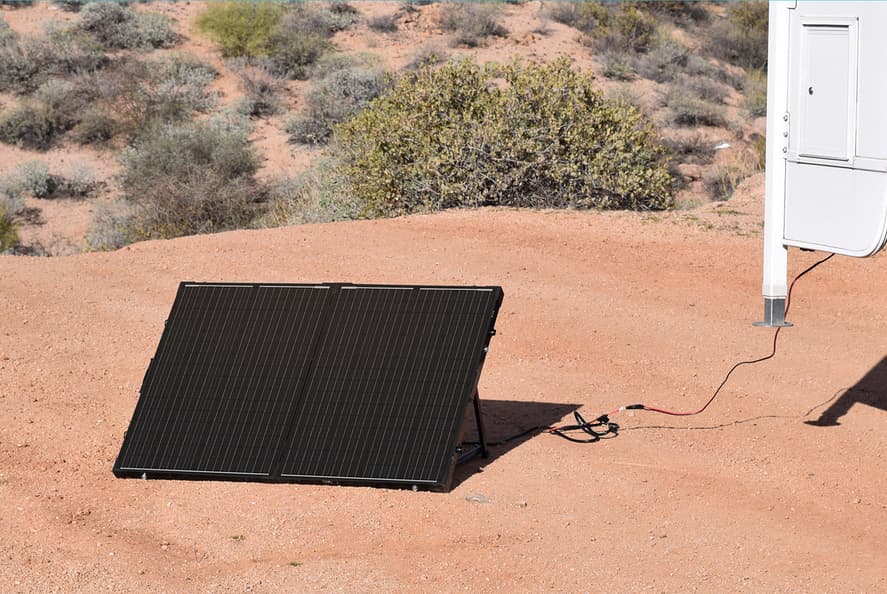
Although there are ways to hook up to the RV through the “solar-ready” port or other methods, I liked the simplicity. I didn’t want to deal with installing panels on the roof, which has its own pros and cons to it and I just wanted something easy to implement.
It’s relatively compact (it folds in half and locks) and I can just set it up outside in just a couple minutes time and connect it right to my battery terminals. The 200-watt suitcase gives me a decent amount of power coming in (depending on the weather, of course) and I can move it around to follow the sun if I want to. It’s simple, portable, and some nice quiet power I’ll have coming in for less than $325.
Changing to a composting toilet… with a twist!
Ok, folks, I saved the best one for last. No boondocking extravaganza would be complete without talking about the good ol’ composting toilet!
It doesn’t matter who you talk to, if they’re not familiar with this, the whole idea makes them uncomfortable with a million questions.
I have a big video that I should be putting out on my new YouTube channel in the near future about installing our composting toilet, but I’ll still try to give you the gist of things here.
When you’re boondocking, one of the hurdles you can run into is your black tank filling up (that’s your pee and poop, folks!). With a 20-gallon black tank and me, Lisa, and Faith (along with my mother-in-law for part of the trip), that would fill up pretty quickly… and that would mean we’d have to leave to go dump the tank somewhere.
That’s where a composting toilet comes into play instead. Your #1 finds its way into a urine basin that you need to dump out occasionally. Your #2 drops in through a trap door where it gets mixed with peat moss or coco coir, dries out, and then essentially becomes compost. Supposedly, it doesn’t smell and has a consistency similar to soil. You can easily just bag it into a garbage bag and throw it out or it can become fertilizer (though you don’t want that in your veggie garden!).
How often you need to empty the #2 “bucket” varies by the number of folks you have doing their business and how often they need to do it. I’ve heard anywhere from a couple of weeks to a month. Either way, that sounds pretty good to a boondocker! As a plus, with a composting toilet, you never have to empty your black tank again.
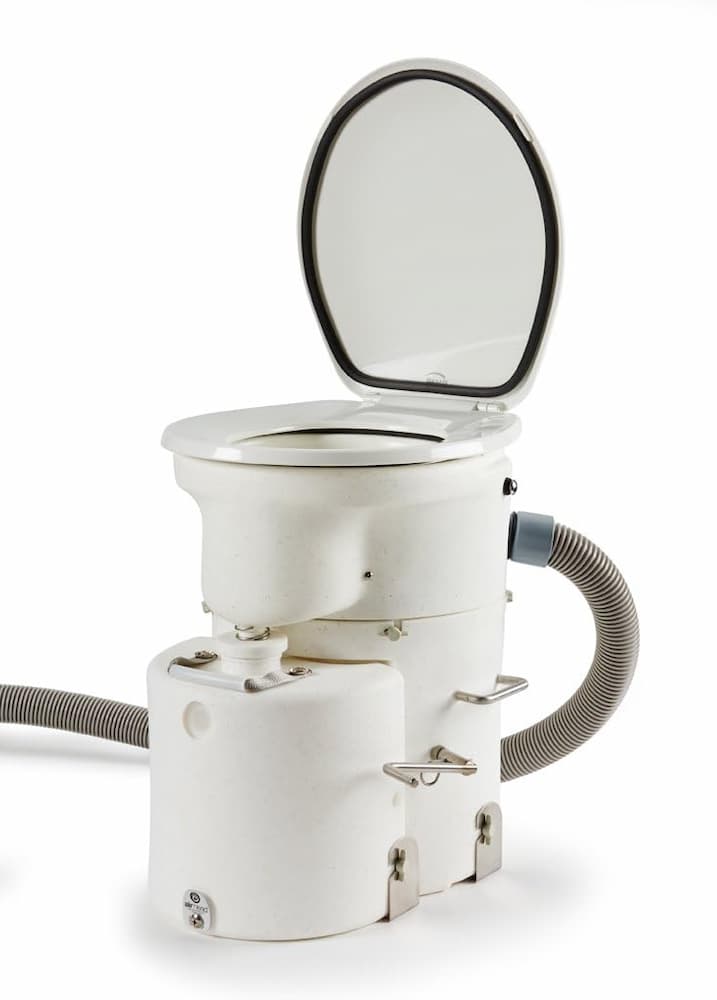
There are a handful of producers of these, but like the Battle Born with batteries, Nature’s Head seems to draw in the influencers because they can earn money through affiliate links (usually Amazon on this one).
But if you dig a little deeper, you find one that seems to have some benefits that the Nature’s Head toilet doesn’t. That toilet is the Air Head Composting Toilet. And they don’t have an affiliate program or sell on Amazon, so these poor content creators can’t make money off of it real easily.
Anyway, I just use what I like and let you know about it. If I find out there’s an affiliate program for the item or service, I’ll add it, but otherwise, no commission for me. Brings a tear to your eye doesn’t it?
But I liked the Air Head toilet over its competitors for a few reasons:
- The urine basin is opaque (with a sight glass) so when you’re walking around outside to go dump it, it’s a little less obvious that you have a bucket of pee under your arm.
- When you want to take out the urine basin, you don’t have to open the toilet to see your #2 composting to get it out… yuck!
- The Air Head uses a standard toilet seat, which just seems a lot more comfortable and something you’re used to.
This one wasn’t cheap – it cost us just shy of $1,200 with tax and shipping but to me, it was worth the couple of extra hundred dollars we spent.
Installing the toilet is pretty straightforward since it’s self-contained. You essentially
- Remove the current toilet and cap off the pipe to the black tank.
- Install the toilet onto the floor with a couple of L brackets.
- Run the exhaust fan out to the exterior of the RV.
- Get power to the exhaust fan by connecting to existing power or running new.
Simple enough… if only I could keep things that easy though!
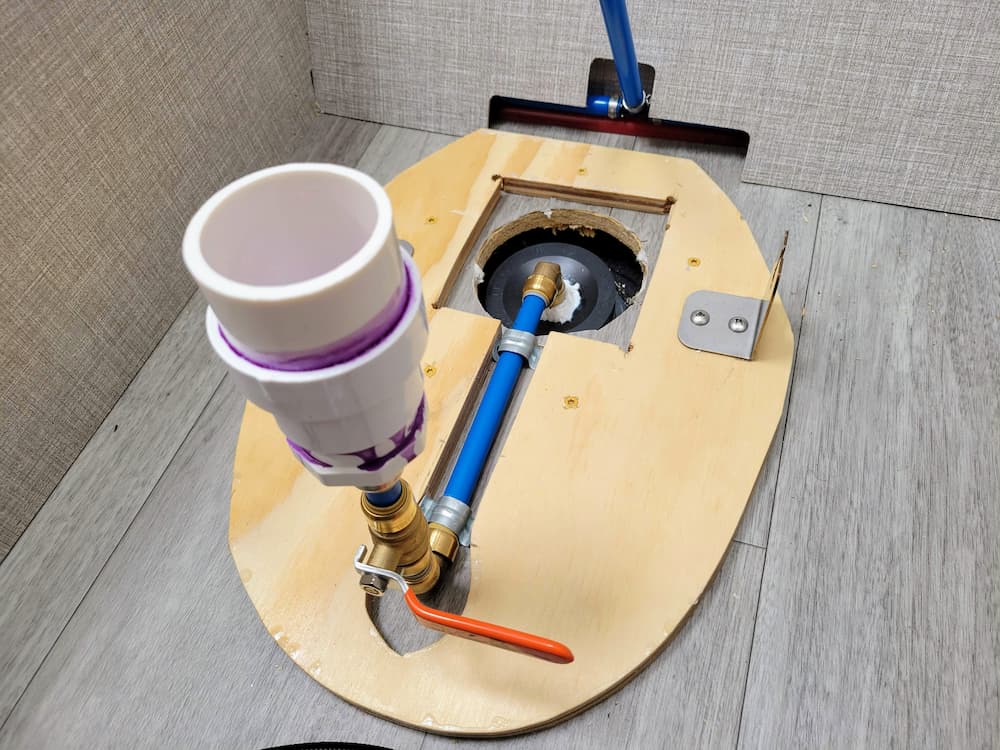
After digging into this more, one of the downsides that people using the toilet talk about is how often you need to empty the “pee bucket.” In our case, I would bet that would be daily, and that not ever going to be a pleasant chore. It’s straight urine so it’s probably pretty pungent, too.
So I decided to take after our friends, Steve and Courtney who traveled around the country full-time for 3 years in an Airstream. I talked to them on the phone and they said the composting toilet was a no-brainer for boondocking but plumbing the urine to the black tank was a game changer. I watched their video on how they did theirs…
I liked that. We could also combine our 20-gallon black tank and 20-gallon gray tank using a Valtera T58 valve. The urine will be diluted with the gray water and 40 gallons is now a much better scenario to have.
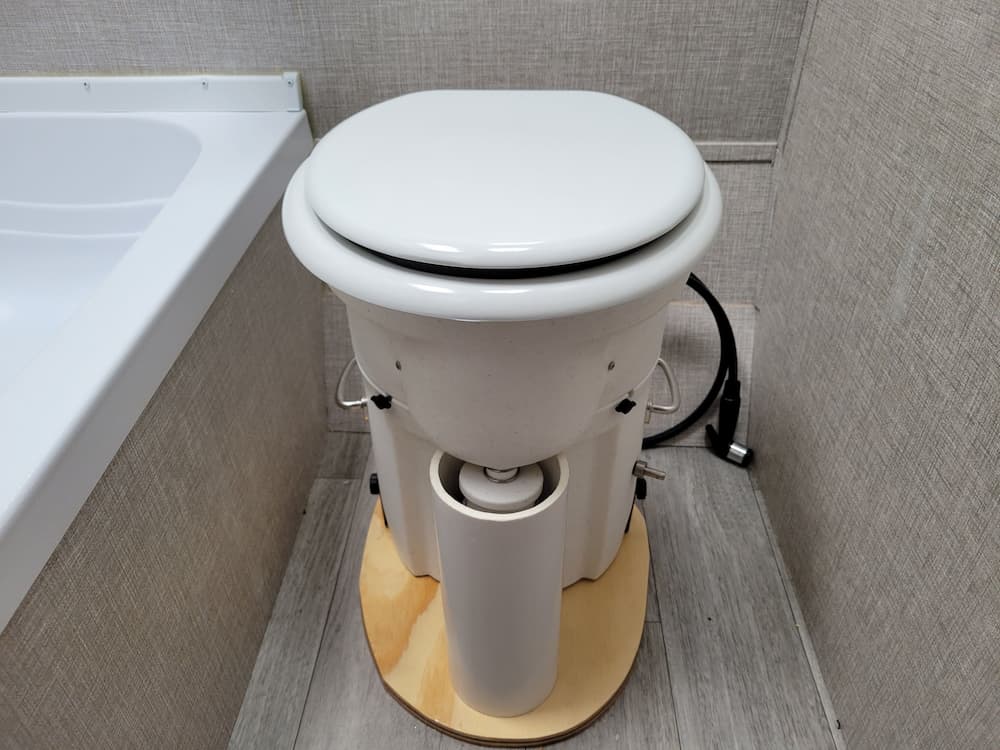
I made this into a project and I’m close to wrapping up. This was tough for me as I’m not the handiest guy but I’m happy with how it turned out. I don’t have photos of the finished project yet, but here’s what the urine plumbed to the black tank and the Air Head toilet looks like…
I’ll release the video going more in-depth on why we wanted the composting toilet along with the installation on my YouTube channel hopefully in the next few weeks.
And there you have it, my friends. It’s taken some work up front and a little money, but it should pay off big dividends on our boondocking adventure. I was also careful to make everything reversible as well (with the exception of the hole for the toilet’s vent fan). I plan to sell the trailer as “boondocking-ready” when we return next summer but for those who don’t want it that way, it’ll be easy for them to switch things back.
I can’t tell you how excited I am about this trip. I’m sure we’ll have some headaches but sometimes that’s half the fun (and a big part of the memories!).
To read about our whole RV adventure, here are the related posts from start to finish…
- You Gotta Spend Money To Make Money, Right? Our Monster Travel Experiment
- Adventure Planning: I’ve Made This Mistake Twice
- RV Boondocking: Spending a Little Money on 3 Changes Now to Reap Huge Savings and Enjoy a Better Trip Later
- It’s Amazing What Being Alone With Your Thoughts on a Walk Can Do for You
- The Calyx Institute: Our Secret to Inexpensive, Unlimited, Unthrottled Internet on the Road
- The Ups and Downs of RV Life: 45 Days in Our Tiny Home
- Our 9-Month RV Adventure: The 55+ Essential Items We Bought for the Road
- Our RV Trip Was Quickly Becoming a Florida Flop… Until We Shifted Gears
- The World’s Largest What??!! 7 Months of Our RV Road Trip Complete, 1 To Go!
- 8 Months and 13,409 Miles Later: Our RV Adventure is Over
Plan well, take action, and live your best life!
Thanks for reading!!
— Jim
I’m excited to see how you like the compost toilet Jim, I’ve been considering putting one in my barn, but I’m torn between that and just hooking the existing septic to it, which would mean longer pvc lines to the septic, I dunno. Hey, if your in the Kentucky Lake region, the Land Between The Lakes is a great place for Boondocking. Look forward to hearing about your adventure!
The good news is that it’s easy to install and test if a composting toilet does the job for you since there’s no plumbing needed (unless you’re doing something different like I did). The bad news is that it’s not cheap to buy (though not horribly expensive either). Good luck on deciding the route to go there, Jim!
I just added Land Between The Lakes into my notes to dig into. Thanks for the suggestion!!
Great investments, Jim. Looking forward to having you visit our vast National Forest boondocking sites here in North Georgia in the coming months! There are some beautiful sites along wild tumbling creeks just a few miles from our cabin, you’re going to love having the freedom to boondock here and throughout the country. Happy Trails!
Nice! I might need to pick your brain about those spots when we head down your way, Fritz!